
This page is a resource for riders, ride managers, and ride event organizers who use the GPS application Ride With GPS. It is a powerful ride navigation tool that works like a GPS but runs on your phone.
Quick Start Guide
To Navigate a ride that you have been invited to:
1- Download the “Ride With GPS” app on your phone. For navigation only, get the free Starter Version. You need to have Cell service for this and the next step. You need to create a free account.
2- Click the invitation link in the invite email from the ride manager from your phone. This will download the route or event to your phone. You will get a confirmation email. Note- If the ride is in an area with no cell service, you need to download the routes for offline use.
3- Open the app and from the home page click “events” Find the event or route you want.
4- For the first loop click the three stacked dots on the right and select navigate.
5- Follow the Visual route on the phone screen, and/or listen to the voice cues.
For the best experience please make these settings on your phone:
From the home page, click the settings Wheel, or more/settings.
1- Logging
Turn on: Auto Pause
2- Navigation
Alert distance- set to normal
Turn off: Advance cue warnings, Nearing cue warnings, Imminent cue warnings.
Turn on: Visual alerts, Audio alerts, Spoken alerts, Off-course alerts
Important Ride With GPS Terms and Definitions
Ride With GPS application. (also known here as RWGPS) The app you download and install on your phone. Works on I-phone and Android devices. There are three different versions- one is free, two are paid. They are described below.
The Ride. The ride is the first level navigation entity of the tool. You record a ride when you move over the ground. You can save a ride, send it to others, and navigate the trail using it.
Route. This is a ride you convert into a route on the web site using the RWGPS web tool. A ride can be navigated, but you need to convert the ride to a route in order to add in the custom features- voice prompts, edit the trail, add points of interest, etc.
Routes and loops. Most endurance rides have multiple loops. RWGPS is usually set up with one route per loop. This makes it much easier to keep track of where you should be. A ride with a three loop 50 and a two loop 25 (that of course go over the same loops) would have a total of 3 routes. Three for the 50, and two for the 25.
Event. An event is a collection of routes that make up an endurance ride. For example- if an endurance ride has three loops, the event will be a single entity that contains a single link for downloading all three required routes. Creating and managing events is only available if you purchase the organizer’s package, about $250 a year. The alternative is to send multiple links for riders to download to their phone if the ride has multiple loops.
Cue. A cue is the system name for a recorded voice prompt while navigating. For example, a cue will tell the rider with sound to turn right or left at the next intersection, or there is a vet check ahead, etc. It works like the driving directions you get from the GPS in your car. A ride can be done with or without cues.
POI or Point of Interest. This is a custom note you can drop on the route to help point out special areas like vet checks, danger zones, water locations, highway crossings, historical places on the trail to point out, etc.
RWGPS web site/ browser access. Ridewithgps.com is the website where you can manage your rides, routes, events, and administer your profile and see your saved rides and routes. The higher the level of your subscription you have, the more features and functionality are available.
The elevation profile. Right under your ride or route on the web site you can see a table that shows the elevation totals, grades, and miles of the route.
GPX file. This is the standard for traditional GPS units such as Garmin, etc. You can import and export traditional GPS files in and out of RWGPS in the following formats: GPX, TCX, FIT, or KML.
Helpful Hints
Helpful hints for Ride with GPS
1- battery life.
You need your cell service to download the Event (the ride you are doing) to your phone. Once the event is in the phone, and you are at the ride, you can put your phone in Airplane mode to save battery life. Remember to turn it off if you need to make a call or you will be frustrated!
Carry a portable batter charger with you. there are nice little USB chargers that can totally recharge you prone at vet checks. They cost between $24 and $35 for a good one. Get one with at least 4500 mAh capacity. Check out this tiny one from amazon for Iphones for $30: https://www.amazon.com/iWALK-Portable-Charger-Ultra-Compact-Compatible/dp/B07Y4PRK7Y/ref=sr_1_5?crid=ZFJF5CGPQQXT&keywords=phone%2Bportable%2Bbattery%2Bchargers&qid=1671474172&sprefix=phone%2Bportable%2Bbattery%2Bcharger%2Caps%2C185&sr=8-5&th=1 It will charge your phone 100% once and can be carried with you on the horse.
This type is a bit better: https://www.amazon.com/Anker-Ultra-Compact-High-Speed-VoltageBoost-Technology/dp/B07QXV6N1B/ref=sr_1_6?crid=ZFJF5CGPQQXT&keywords=phone%2Bportable%2Bbattery%2Bchargers&qid=1671474279&sprefix=phone%2Bportable%2Bbattery%2Bcharger%2Caps%2C185&sr=8-6&th=1 It will give you two full charges. Be sure to remember to bring your cable!
This bad boy is almost 39K mAh and will fully charge your phone several times and costs just $35. https://www.amazon.com/Portable-Charger-38800mAh-Charging-Compatible/dp/B09H4GLZXT/ref=sr_1_18?crid=ZFJF5CGPQQXT&keywords=phone%2Bportable%2Bbattery%2Bchargers&qid=1671474279&sprefix=phone%2Bportable%2Bbattery%2Bcharger%2Caps%2C185&sr=8-18&th=1
Some good rides will provide a little phone charge station at the lunch hold. Just be sure to pick up your phone before you leave for lunch! Put a sticky note on your saddle or someplace so you won’t forget the phone.
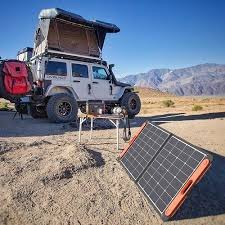
Solar Charge Station at the Out Vet Check
To conserve your phone battery, put your phone in airplane mode, close all other apps and keep the screen off as much as possible. A screen left on will drain your battery quickly. Charge your phone at the vet check and carry a portable power pack just in case.
Click here https://ridewithgps.com/help/battery-saving-tips/ for other battery saving tips.
Android & iphone users: Turn off power saving mode. Riding with it on can have a very negative effect on GPS recording quality.
Keep your phone near the top of your pack or out in the open. GPS signal is received best when your phone has a clear view to the sky. SP Connect has some fantastic case and mounting options.
On Ride day, open Ride With GPS before mounting. Tap on the correct event (endurance ride) select your route, tap the three dots to the right, then tap navigate. When you have completed the route be sure to save your ride. Save by long pressing the circle with two vertical lines then tap save. This will save the route you just rode to your phone and will be available for your use. It’s also great proof you rode the correct trail!
You may start navigation at any point on a route but you absolutely MUST ride the route in the correct direction for voice cues to be correct.
If you are using an iphone you will need to control the volume within the Ride With GPS app not with the phone ringer volume. To do that, tap on your route , start navigation then tap tools and locate the volume button.
Using a bluetooth headset with one ear piece in may be the best way to ensure you are able to hear the voice cues. Trail noise can be loud.
There are many personal setting options within Ride With GPS that can be adjusted to your liking. Click on the following link to learn about some options. https://ridewithgps.com/help/manage-settings-on-mobile#logging
For example, you may have metrics such as Average Moving Speed, Remaining Distance, Estimated Time Remaining and more read to you at selected mileage. If you are not using a bluetooth familiarize your horse to the sounds of Ride With GPS while standing or walking next to your horse prior to mounting.